Routific is a delivery routing platform that automatically optimises your delivery schedule. It allows you to work with the most efficient route for your orders, to track drivers when they are out for delivery and it notifies customers of the status of their delivery through customisable messages.
The best part is – you don’t need to pay any extra costs as it is integrated and included in our Cookaborough fees.
Whatever the size of your business or how many deliveries you make, Routific really does make planning your routes effortless. We really encourage you to use this functionality as it not only makes the delivery process easy to manage but enhances your customer’s experience.
If you are currently not offering deliveries because you think it may be too hard - perhaps give Routific a go to see how easy it can be to manage deliveries. As with many automated softwares, there is a setup required the first time you use it because you need to give the platform the information it needs to automate, but after your first delivery it’s a piece of cake.
Step 1: Create your Routific account
To create a Routific account, you will need to:
- Sign up for a free-7-day trial account (no credit card is required) here
- Email our team at help@cookaborough.com with your kitchen name & email address so we can link you to our account to give you ongoing free access.
Step 2: Connect Routific with your Cookaborough account
Connecting your Routific and Cookaborough account is an easy two-step process.
- First, sign into your Cookaborough account
- Open a new window in your browser and open up your Routific account with the ‘My account’ icon located on the left hand side navigation bar above the Help icon.
- Open your account page in Routific and select then copy your unique API Token.

TIP: BE SURE TO COPY ONLY THE LETTERS, NUMBERS AND SYMBOLS IN THE TOKEN. YOU DO NOT NEED TO COPY THE ‘AUTHORISATION: BEARER’ TEXT AT THE START OF THE TOKEN.
Go to the tab for your Cookaborough account. In your Settings section select the Pick up & Delivery tab. Scroll down to the Delivery Planner section and paste the API token into the required field.

TIP: Don’t forget to ‘Save settings’ before you exit the tab.
Step 3: Configure your Routific account
Now you have connected your Routific and Cookaborough accounts, it is time to configure your Routific account.
You will need to be logged into your Routific account to complete Step 3.
Routific offers lots more features for you to explore and have a library of relevant guides to help. If you want to learn more about Routific, you can check out their Knowledge Academy here.
Establish your default Project Settings
With Routific you will create a new project every time you want to set up a delivery run. In Routific, a delivery day means a Project. So it’s a great idea to establish your default Project Settings.
The Project settings panel controls many of the conditions of your deliveries. Click on the ‘Settings’ icon located in the top right hand corner of your home page.
We suggest adopting some of the following default project Settings:
- For Distance format select Kms
- For Default duration select 2 mins
- For Optimisation preference select Time

To learn more about the full suite of Project Settings available in Routific, click here.
Add your drivers
You will need to add the driver(s) you plan on using to complete your deliveries (Projects). You can add drivers manually one-by-one, or you can upload a spreadsheet with all the drivers’ information.
To add drivers, click on the Drivers icon located in the top left hand corner of the home page.
TIP: EACH DRIVER WILL NEED TO DOWNLOAD THE ROUTIFIC DRIVER’S APP.
You can find more information and tips on how to add drivers here.
Manage customer notifications
Within your Routific account at the top of the left hand side navigation bar, you will find an icon called Customer Notifications.

On the Customer Notifications page you will find two tabs.
- Notification settings - this allows you to choose how you would like to send notifications to customers
- How do you want to send your notifications? - we recommend selecting SMS only.
- Date & time format - choose your preferred date & time format.
- Notification templates - Which notifications do you want to send? There are four different types of notification templates available. We suggest activating only the following two templates to start with. You can always add the other two settings once you try out the most basic ones below:
- Out for Delivery - lets customers know about upcoming deliveries:
- Communicated time window lets customers know their delivery is happening soon. This message gets triggered whenever a driver marks a preceding stop as complete in the Driver App (or when the driver clicks "Start" at the beginning of the route) - i.e. in real time for each customer. Customers will only receive this once. We recommend setting it at 30 minutes.
- Customize your message: allows you to customise the message your customers will receive. This is triggered when a driver confirms a delivery as complete in the Driver app.
- After Delivery - allows you to customise messages once delivery is completed or skipped
- Completed delivery allows you to customise your message upon a successful delivery
- Skipped delivery sometimes a delivery may be skipped for some reason. This allows you to customise your message upon a skipped delivery

TIP: Once a notification has been set to ‘ON’ these notifications will automatically be sent to your customers at the appropriate time from your Routific account.
Notification text examples
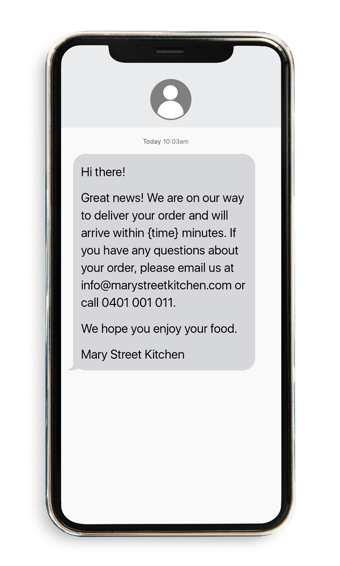

To learn more about customer notifications on Routific, click here.
Step 4: Manage the week’s deliveries
Now you have configured Routific, you can now use Routific to manage the week’s deliveries.
Exporting your deliveries to Routific
Once your Menu has closed, you can export your deliveries directly from your Cookaborough account into Routific.
To do this:
- Log into your Cookaborough account
- Select Data from the sidebar navigation and go to the Reports page
- Go to Menu Reports and from the dropdown box, select the relevant menu.
- Select the Export to Routific report.
- A dropdown box will appear - select All or a specific delivery date if you have more than one delivery date on that week’s menu.
- Click Export.
TIP: MAKE SURE THE GREEN ‘EXPORT COMPLETE!’ BOX APPEARS AT THE BOTTOM RIGHT OF SCREEN. THIS CONFIRMS YOUR EXPORT HAS BEEN SUCCESSFUL.


Once this export from Cookaborough is complete, back in Routific you can view this delivery project by clicking on All Projects on the top left of their screen (second icon from the top).
Troubleshooting exports
If you receive an error message when exporting your deliveries to Routific, this is due to a ‘data incomplete’ issue, which is most commonly a missing, an incomplete or a landline telephone number (Routific only recognises mobile numbers). This means you will need to upload your delivery list to Routific in a different way.
Uploading your deliveries to Routific from a Delivery Export.
If an error message occurs, you will need to select the Delivery Export report from the Menu reports page instead of the Export to Routific button.
When you select the Delivery Export report, two dropdowns will appear:
- First dropdown - select All or the specific delivery date that you want and
- Second dropdown - select Routific and click Generate.
Once the export has been generated, we recommend you review the spreadsheet, fix the error and then Save a copy of the export. If the error is because of a landline number, try to
To upload this spreadsheet into Routific:
- Sign into your Routific account.
- Select the blue Start a new project button located in the bottom right hand corner of your home page and
- In the Stops tab, select Upload a List of Stops. You can either drag and drop the file, or Select a file from your computer to complete the upload.
Managing deliveries
Once you have successfully exported your deliveries to your Routific account, the next
step is to review the suggested delivery route and “dispatch” routes to your driver(s).
To do this:
- Sign into your Routific account.
- Select All Projects from the left-hand side panel.
- Select the Menu that has been exported.
- Assign drivers to the project - i.e the people who are going to complete the deliveries. To do this, you can either add new drivers to the project or use your pre-saved list of drivers. When adding drivers we recommended including:
- a start and finish address for each driver so you can track where each of your driver(s) are in their delivery route. Usually this is the Kitchen address but it depends how your drivers work - for example you may pay your driver’s travel time to or from their home.
- working hours of drivers (i.e start and end time) so Routific can assign delivery routes aligned to each driver’s start time.
- mobile phone numbers so that once the route is dispatched, your drivers will receive a text message with a link to their assigned route.
Once your drivers have been assigned to the delivery run, you will see their names appear in the bottom section of your home page.
TIP: DON’T FORGET, IF YOU ADD NEW DRIVERS TO THE PROJECT, THEY WILL NEED TO DOWNLOAD THE ROUTIFIC DRIVER'S APP.
Routific will then automatically optimise the best journey pathways for deliveries and assign these pathways to available drivers. You are however able to change the proposed route if you would like to adopt a different route. To do this, follow these steps.
TIP: ROUTIFIC ‘AUTO-BALANCES’ THE AMOUNT OF DELIVERIES FOR DRIVERS. BE SURE TO REVIEW THE PROPOSED DRIVER ROUTE ALLOCATIONS IN CASE YOU WANT TO RE-ALLOCATE SOME DELIVERIES TO A PARTICULAR DRIVER.
When you are ready you can Dispatch the route to your drivers. This will send a text message to the drivers.
TIP: ROUTIFIC WILL ONLY SEND THIS MESSAGE TO THE DRIVER AND NOT THE CUSTOMER UNLESS YOU HAVE TURNED ON PLANNED DELIVERY NOTIFICATIONS. THE DEFAULT ROUTIFIC MESSAGE INCLUDES BOTH DRIVER AND CUSTOMER BUT DISREGARD THIS
Once drivers are ready to start the deliveries - typically your Delivery Window start time you have set up in Cookaborough - they click on their message and press START. This will take them to a web app visualisation (similar to google maps) which will help them navigate each of their drop off locations.
Customers will be automatically advised on delivery progress based on the notification settings you created when establishing your account.
Once each delivery is completed, the driver confirms the successful delivery on the app which then triggers the notification for the following customer that the delivery is on the way.
To transfer the same driver details to future delivery routes, the simplest way to do this is:
- Go to All Projects.
- Select the most recent project.
- Go to the top left dropdown menu and select Save a Copy.
TIP: A GREAT ADDED BONUS WITH ROUTIFIC IS THAT YOU CAN KEEP TRACK OF YOUR DRIVERS’ PROGRESS FROM YOUR DESKTOP.
If you want more information on how to manage deliveries in Routific, check out how to dispatch routes here and also how to make changes to your routes here.
Useful Routific links
Settings
Project Settings
Adding drivers
Customer notifications
Photo signatures upon delivery
Driver app details
Routing
How to add stops
How to dispatch routes
Swapping routes between drivers
How to make changes to your routes
Making last minute route changes after dispatching
How to reverse a route
How to Allocate Routes Evenly Across Drivers
Deliveries
How to Capture Photo & Signatures
Troubleshooting
Address Formatting Issues
Using the App to Plan Routes
What Happens to App When No Internet Signal?
Changing the Routing Durations
Customer Notification Issues
Need more help?
Online: Helpful information can be found by visiting our support center here.
Email: If you have further questions or need assistance, contact our team..png)