Welcome to Cookaborough
We’re thrilled to have you join the Cookaborough community.
Our mission is to make it easy to start, run and grow a food business and we’re passionate about making your experience with Cookaborough a positive one. We look forward to supporting you no matter where you are on your journey.
How to use this guide
We recommend keeping this guide open as you set up your Cookaborough account so you can learn more about each section and how to complete it. If you need additional support, feel free to contact our team for help.
Contents:
Step 1: Access your Settings page
Step 2: Enter your business details
Step 3: Create your Kitchen page
Step 4: Set pickup and delivery options
Step 1: Access your Settings page
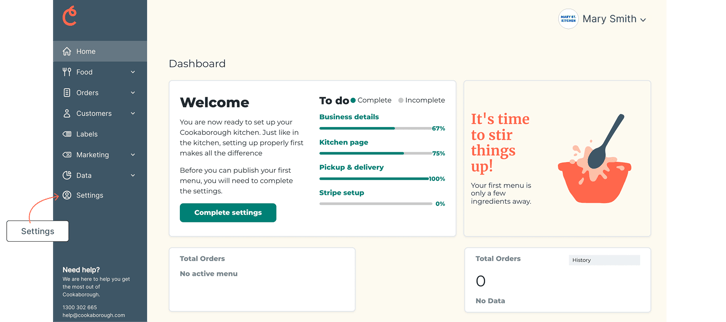
Access your Settings page by logging in to your account and selecting the Complete settings button on your dashboard. You can also access Settings via the gear icon on the side navigation.
Step 2: Enter your business details
To complete this part of your account setup, you’ll need your:
- ABN
- Food handling certificate
- Council registration certificate
- Registered business address
- Bank account details (BSB and Account number)
You can get started if you don’t have all of these documents. Fill in what you can and drop us an email at help@cookaborough.com if you need a hand.
Australian Business Number (ABN)
To use Cookaborough, you are required to operate as a registered Australian business with a valid ABN. For more information on obtaining an ABN click here.
Business compliance
To use Cookaborough, you’ll need to hold current food handling and council registration certificates. This protects you by ensuring you’re covered by our insurance policy, and boosts customer confidence.
Payments
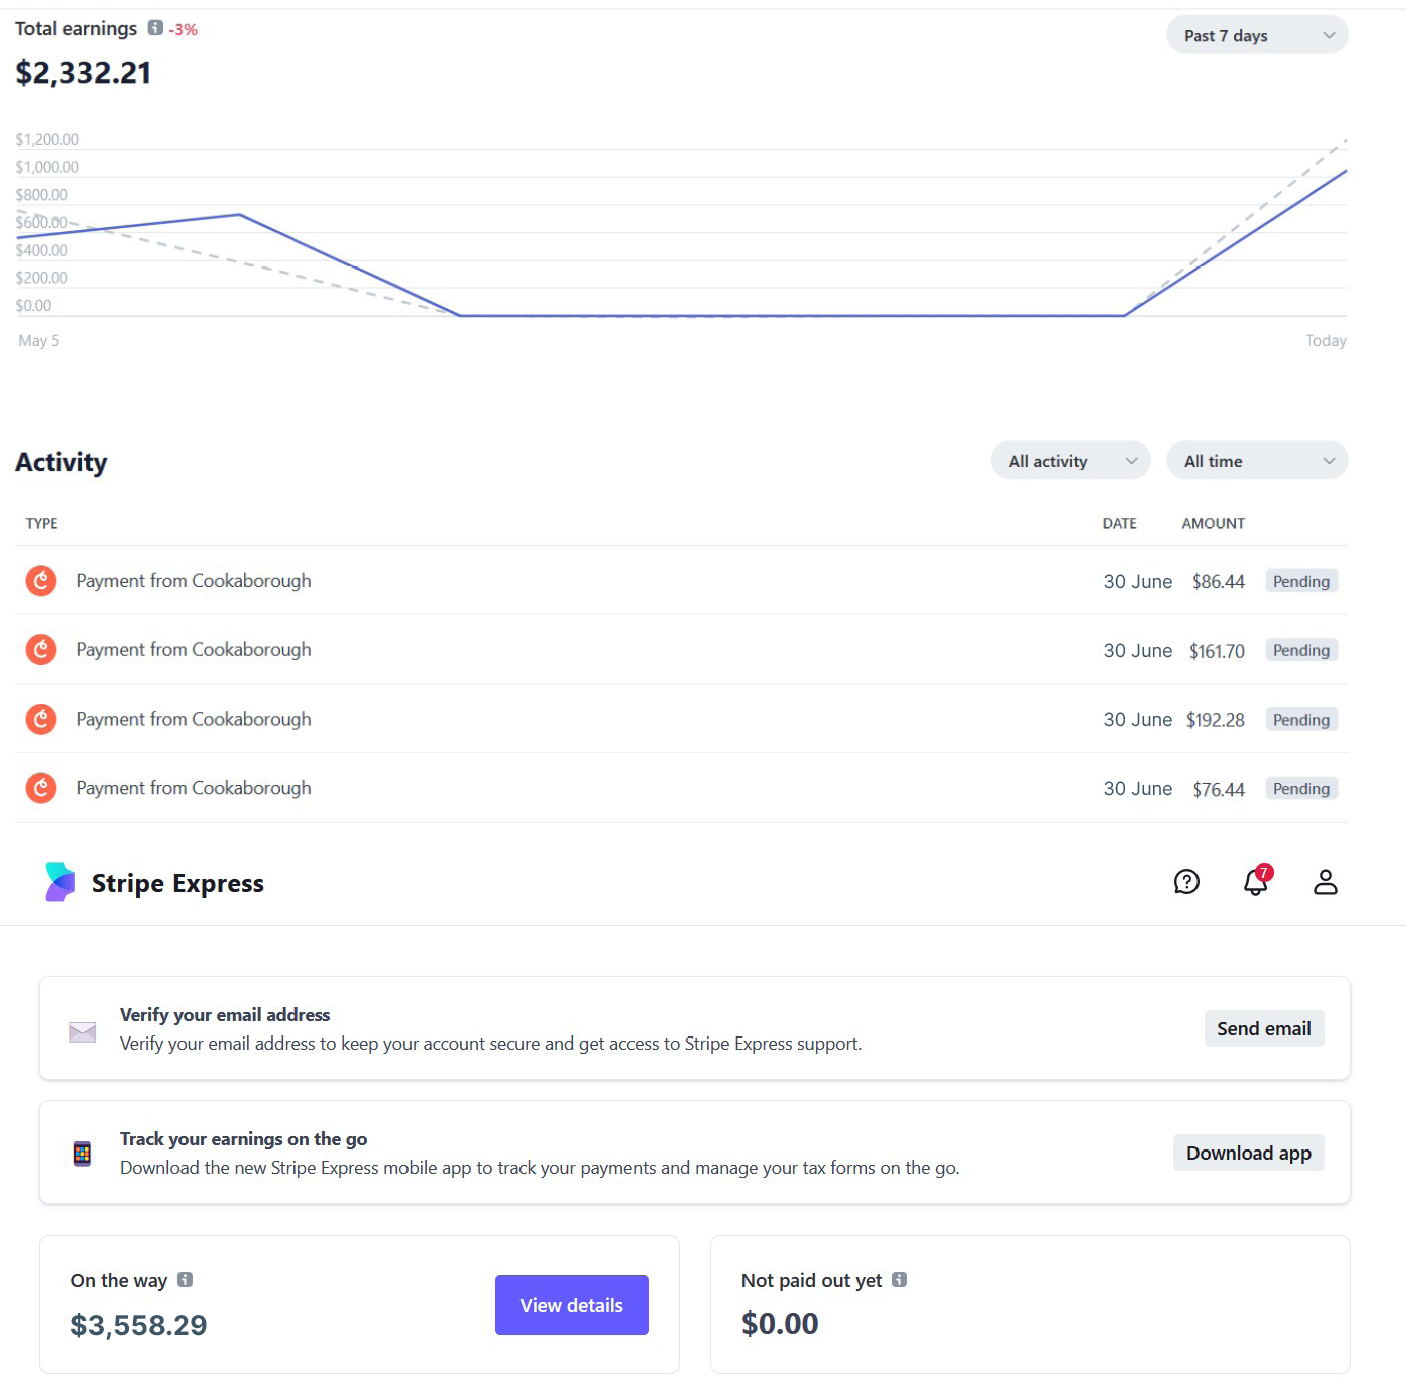
Set up a Stripe account in order to be paid through Cookaborough. Stripe is safe, fast and easy. As the world’s leading online payment gateway, it’s trusted and used by millions of businesses.
You’ll receive customer payments directly to your Stripe account. Then, funds will be transferred to your nominated bank account, less Cookaborough’s commission every Friday. Please note funds typically take 2 business days to clear.
Once you start using Cookaborough, you’ll be able to access your Stripe dashboard to view all transactions via your Settings page. Your Stripe dashboard is where you can see your current account balance and expected payout.
Step 3: Create your Kitchen page
Your Kitchen page is your very own page on Cookaborough. It is where your customers can see your menu and place their orders, buy gift vouchers, view your frequently asked questions and more.
Your Kitchen page is also a great place to include a description of you and your business, and how your business works. Include information about how you create your menus, the types of items you sell, and when customers can expect to receive their orders. Feel free to get creative and add personal touches.
Kitchen link
This is an automatically generated link that you can copy and share with customers, to take them directly to your Kitchen page. We address how to use this link in our 'how to build your customer database resource' (coming soon).
About
This is where you tell your story so customers can learn about who you are, the food you make and how your business works. This section can be a powerful way to build an initial connection with your customers.
A few ideas:
- Tell your story - Share your food journey, your passion for cooking, and introduce your team if you have one. It’s about building your brand and profile.
- What’s on the menu - Let people know what type of food you make, the ingredients you use, where you shop, your approach to cooking, dietary requirements you cater for, etc.
- How it works - Include practical points like when your menu opens and closes and how pickup and deliveries work. You might also want to mention which areas or postcodes you deliver to.
It’s worth checking out how some successful cooks have approached this:
Eastwood’s at Home - For The Love of Food - Meraki Produce
If you need a few more pointers, check out this resource for help.
Banner image
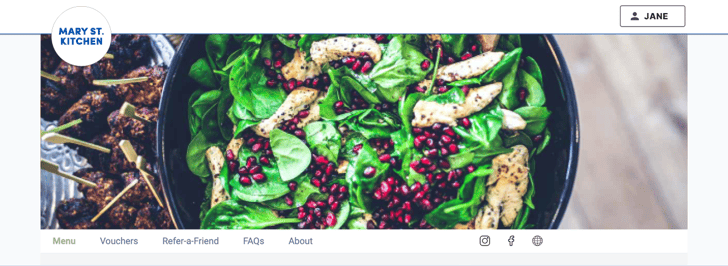
Your banner image displays at the top of your Kitchen page and adds a visual element that sets the tone of your page. When selecting a banner image we recommend following these tips:
DO:
- Use an image that is orientated as landscape - so wider than it is tall.
- Make sure the image is high-quality, the lighting is good and focus is clear.
- Use a high-contrast image (think intense colours and textures, so the image stands out on the page).
- Use an image that is relevant to you and your brand and hooks visitors to your page.
DON'T:
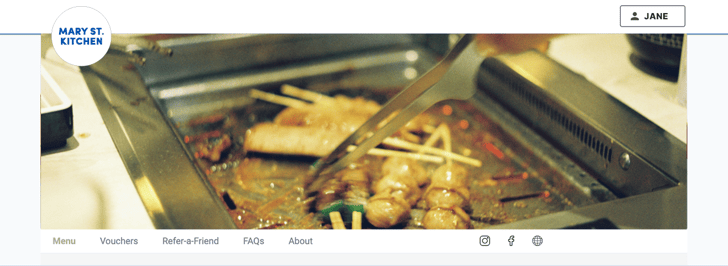
- Use a profile picture of just your face - rather choose a few people in a row or something on either side of you.
- Use an image that has borders as these highlight cropping issues.
- Use an image that includes written text or your kitchen logo as these are not generally created in the right size for a landscape and look weird when stretched!
Check out a few great examples of banner images:
Felicity’s Kitchen - La Moka Cafe - Oriental Tea House
TIP: If you're using a professional photographer let them know the technical specification for an optimal Banner image is a 2:1 ratio which just means the width is twice as big as the height.
Kitchen logo
Upload your logo to enhance brand presence. If you are having difficulty with your logo fitting properly, send it to our team and our designers will adjust it to fit perfectly.
Colour theme
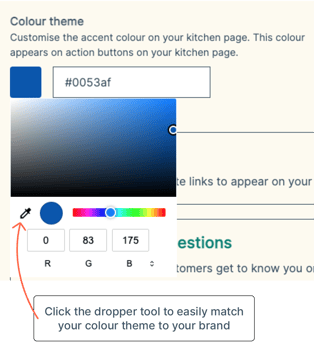
Colour theme refers to the colour of the buttons on your Kitchen page. The text on these buttons is white, so choose a bold colour that will allow the white text to stand out.
TIP: MATCH YOUR COLOUR THEME TO YOUR BRAND BY USING THE DROPPER TOOL TO SELECT ANY COLOUR ON YOUR SCREEN - PERHAPS THE COLOUR OF YOUR LOGO, OR A FEATURED IMAGE.
Frequently asked questions
FAQs are a great way for customers to learn more about you and how your kitchen works as well as finding helpful information that will improve their experience. It’s worth taking the time to create clear FAQs - this section can be the difference between a customer signing up and placing an order, or leaving the page.
Feel free to use the below FAQs and edit them to fit your needs. You can also add custom FAQs specific to your business. Don't feel you need to add all your questions straight away - you can continue to add new FAQs to the list and update them as you go.
Cookaborough FAQ examples:
Q: How do I order?
A: Order via our Kitchen page at [address]. You’ll need an account to place orders online. To create an account, select the 'Sign up/Login' button located at the top of our Kitchen page and enter your details. Once you’ve signed up, you’ll receive our new menu via email from us each week. You can unsubscribe at any time.
Q: When can I order?
A: Our menu is open for orders from 8am Wednesday to 11pm Friday each week. Closing our menu each week gives us time to source the highest-quality ingredients for your meals, then prep and cook each item from scratch.
Q: When will I receive my order?
A: Mondays. Pick up is between 4-6pm and delivery is from 4-7pm.
Q: Is there a fee for delivery?
A: Delivery is free for orders over $150. If your order is under $150, we charge a small $10 delivery fee.
For more on how to use FAQs to support your food business and more examples on suggested questions and answers check out this resource here.
Advanced settings > QR code
Cookaborough will automatically generate a QR code for you. Customers can use their mobile device to scan the QR code and will be taken to your Kitchen page, where they can sign up and place orders.
You can use your QR code on printed materials such as in-store counter units, postcard flyers and fridge magnets. We have a selection of templates showing different ways to use the QR code. Get in touch with our team to learn more.
We also have a detailed how to build your customer database resource, with ideas and suggestions on how to use your QR code to grow your customers (coming soon).
Advanced settings > Join Find-a-Cook Marketplace
Here is where you can decide how discoverable you want to be to the general public. You can help new customers find you by opting to be listed on Cookaborough’s Find-a-Cook Marketplace. When selected, a snapshot of your business will be visible to customers searching for local food businesses on Cookaborough.
If you’d prefer to keep your Kitchen page more private between you and a direct customer list, leave this option unselected.
Examples of Find a cook listings
Advanced Settings > NDIS & HCP programs
You have the ability to select to participate in the National Disability & Insurance Scheme (NDIS) and Home Care Package (HCPs) programs.
By offering your services to NDIS and HCP participants, you’re agreeing that those customers may choose to pay for a portion of their meals at checkout, with the remainder being paid using their government funding. Cookaborough handles this entire process including automatically issuing an invoice to the customer’s Plan Manager for payment.
You do not need to register as a NDIS and HCP Provider as the invoice requirements to be compatible with these programs are handled for you by Cookaborough.
Here’s a little more info on these programs:
The NDIS is a program designed to provide access to funding for over 500,000 Australians who have a permanent and significant disability. NDIS participants can put their funding toward support and services that improve their quality of life.
HCPs assist qualifying Senior Australians (over 65) to remain at home for longer, as well as providing them with choice of how their support is provided.
These are both nationally run programs that are providing choice and independence to people in need, and they are projected to grow considerably as a pillar of servicing the disability and aged care sectors. Due to strict compliance requirements, receiving payments through these funding schemes has been difficult for small food businesses, however Cookaborough has built a solution that navigates this process.
To learn more about NDIS and HCP and how Cookaborough helps you service participants in these programs, check out this resource for more information.
Advanced Settings > Gifting
Give your customers the ability to purchase gift vouchers from you. You’ll receive the proceeds of these funds at the point of purchase, and the recipient will be able to spend the credits until they are fully realised.
To create a visually appealing gift voucher, we recommend you use an image that is orientated as portrait (so taller than it is wide) and does not include written text or your kitchen logo - as this is automatically included on the voucher by default.
You can also offer customers the opportunity to place Gift orders. This allows customers to order a gift of meals to family, friends or colleagues, and include a gift note with their order.
Step 4: Set up pickup & delivery options
Pickup
You have the ability to create multiple pickup locations where your customers can pick up their meals.
Delivery
We provide you with complete flexibility in terms of how you manage all aspects of the delivery process, including what delivery areas you cover.
Minimum spend
You can decide to attach conditions to your deliveries, such as establishing the minimum spend (or minimum order amount) a customer will need to make to choose delivery.
You are free to choose whatever minimum spend you like, and you can set different minimum spends for each delivery zone. There are no right or wrong amounts. As a guide, we generally see businesses offering delivery for orders between $50 - $80, and offering free delivery for orders of $100 - $200.
Delivery zones
You can use a variety of zones to suit the changing demands of your circumstances. For instance, you can set up a narrower, more local zone as your standard route and an expanded zone for special events. You can split your zones into different areas, such as ‘North & South’ or ‘North, South, East & West’ in order to make your delivery process more efficient. You can choose to add delivery zones by radius, or enter in suburbs and towns manually.
If you are uncertain what areas to cover, we suggest starting with a narrower zone focusing on nearby customers, and building upon this over time.
If you still have questions on setting up delivery zones, check out our resource here (coming soon).
Routific
Routific is a delivery routing platform that automatically optimises your delivery schedule. It allows you to track drivers when they are out for delivery and automatically tells customers the status of their delivery through customisable messages.
If you offer deliveries, we encourage utilising this functionality as it makes the delivery process easy to manage and enhances your customer’s experience. The best part is – you don’t need to pay any extra costs as it is included in our service!
Some key features of Routific include:
- Optimised routing to ensure the most efficient route is selected.
- Driver app that makes the driver’s job easy, by including prompts such as specific customer instructions.
- Automatic, personalised notifications informing customers when they can expect delivery of their meals, when it's been delivered etc.
- Ability to track delivery progress, including where each driver is in the delivery process and whether there are any issues.
To activate Routific:
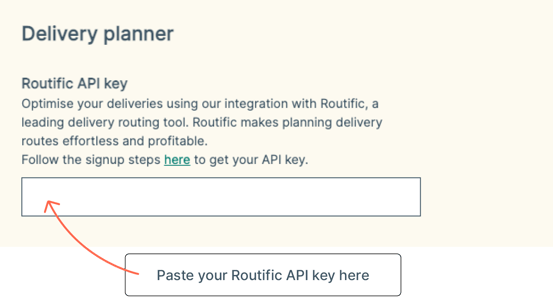
- Sign up for the free 7-day trial with Routific.
- Copy your Routific API token.
- Paste your Routific API token into your Settings page under Pick up & Delivery.
- Email our team with your kitchen name & email address so we can link you to our account to give you ongoing free access.
For help in navigating Routific to manage your deliveries, check out our resource here (coming soon).
Step 5: Customise your notifications
You can use the Notifications tab to customise the information you and your customers receive from Cookaborough. Customise your notifications to suit you, and change them later if you need to.
An important notification to complete is your Menu closed description. This message will display on your Kitchen page when you do not have a menu open. Use this notification to tell prospective customers how to sign up to receive your next menu and also how your kitchen works.
Thank you
We love staying connected and we’re here to help, so please reach out if you have any queries. We’re committed to helping you run and grow your business, and we’re always evolving our tools and resources to better support you. If you have any ideas of how else we can help, we’d love to hear from you.
Need more help?
Online: Check out the 'Learn' tab on the Cookaborough home page for more information.
Email: If you have further questions or need assistance, contact our team.
